Saturday, 7 September 2024

Bagila Bil Dihin – A Beloved Breakfast Tradition


 There's something special about the breakfast Bagila Bil Dihin, a dish that brings families together around the table. It’s a hearty, flavorful meal made with broad beans, fried eggs, and soaked bread that creates the perfect start to any day. Whenever we visit my mother-in-law, this dish is always a highlight of our family gatherings. Her version of Bagila Bil Dihin has become a favorite,  and I’m excited to share this simple yet delicious recipe with you.

This is a classic vegetarian Iraqi breakfast and consists of cut-up chunks of bread soaked in broad beans, and the broth from the beans. It is topped with a fried egg. The combination of soft bread, tender broad beans, and the richness of a fried egg on top makes it both comforting and satisfying.

Ingredients:

2 cups dried broad beans (or canned, for convenience)
1 tsp baking soda (if using dried beans)
1 tsp salt
4 large eggs
4-6 pieces of Iraqi bread (or any flatbread)
2 tbsp olive oil (or butter)
1 tsp cumin powder and 2 cloves of minced garlic
Fresh parsley, chopped (for garnish)
1 lemon, cut into wedges
Salt and pepper to taste

Method: 

1. If using dried broad beans, soak them overnight in water with baking soda. The next day, drain and rinse the beans. In a large pot, cover the beans with water, add salt, and bring to a boil. Reduce the heat and let the beans simmer for about 45 minutes or until tender.
2. If using canned broad beans, simply heat them in a pot with a little water and a pinch of salt.

3. Cut the bread into large chunks and set it aside. Traditionally, Iraqi samoon or tanoor bread is used, but any flatbread will work. The bread chunks should be bite-sized but large enough to hold up when soaked in the broth.

4. This step can be skipped: In a small pan, heat olive oil (or butter) over medium heat. Add the minced garlic and cumin powder, and sauté for 1-2 minutes until fragrant. Pour this mixture into the pot with the beans and stir well.

5. In a separate frying pan, fry the eggs to your liking. Traditionally, the eggs are cooked sunny-side up, with a runny yolk that blends beautifully with the rest of the dish.

6. To serve, spoon the bread and beans into bowls, making sure to include some of the flavorful broth. Place a fried egg on top of each portion, season with salt and pepper, and sprinkle with fresh parsley for garnish. Serve with lemon wedges on the side for a zesty finish.

Optional Additions:
For an extra touch of flavor, you can drizzle a bit of olive oil or a sprinkle of paprika over the top. Some families also enjoy adding a spoonful of yogurt or labneh on the side for creaminess.

A Breakfast Rich in Tradition
Bagila Bil Dihin is more than just a meal – it’s a reminder of togetherness, comfort, and tradition. Whether enjoyed during a family gathering or as a simple breakfast at home, this dish brings amazing  flavors to the table. It's incredibly satisfying, packed with protein, and the perfect balance of soft bread, rich beans, and the warmth of a fried egg.

For those who love plant-based dishes, this recipe is typically vegetarian, making it ideal for both meat-eaters and vegetarians alike.
Enjoy!

Bake Your Own Lingongrova Bread – Perfect for Snacks and School Lunchboxes

Lingongrova bread holds a special place in Swedish hearts, as well as for my kids. It's no wonder that it's a popular choice for both snacks and school break sandwiches. The sweet and tangy flavor of lingonberries combined with the rich and hearty character of whole-grain bread makes it a favorite for both kids and adults. I received a fantastic recipe from a colleague, and since my children love this bread (and we go through many loaves each week), I thought I’d share it with you. It’s simple to bake and perfect to freeze, so you always have fresh bread on hand.


Lingongrova is a classic dark bread rooted in the Swedish tradition of using whole grains and natural ingredients. Lingonberries, a common Nordic fruit, have long been a staple in Swedish cuisine because of their high nutritional value and long shelf life. The combination of fiber-rich whole-grain flours and the tangy sweetness of lingonberries makes lingongrova bread both healthy and delicious. This bread is not just tasty – it's also a way to pass on a piece of our Swedish culinary heritage to the next generation.

Ingredients:

 3 dl coarse rye flour

3 dl all-purpose flour

2 dl rolled oats

1 ½ tsp baking powder

1 ½ tsp baking soda

1 tsp salt

2 dl mix of seed: sunflower seeds, poppy seeds, flaxseeds, pumpkin seeds or any other seed of your choice 

3 ½ dl buttermilk or plain yogurt

2 eggs

1 dl lingonberry jam

1 dl light syrup

Additional liquid, such as milk, if needed

Method: 

1. In a medium bowl, mix together the dry ingredients: rye flour, all-purpose flour, oats, baking powder, baking soda, salt, and sunflower seeds.

2. In a large bowl, whisk together the wet ingredients: buttermilk (or yogurt), eggs, lingonberry jam, and light syrup.

3. Gradually stir the dry ingredients into the wet ingredients, mixing well. The batter should be sticky but not too wet. If it's too dry and resembles dough rather than batter, add a little more liquid, such as milk.

4. Pour the batter into a greased 2-liter bread tin. Bake in the lower part of the oven at 175°C for about 1 hour, or until the bread is dry in the middle. Use a thermometer to check that the internal temperature reaches 90°C (194°F).

5. Let the bread cool on a wire rack before slicing.

Enjoy your hearty, homemade rye and lingonberry bread—perfect for a wholesome snack, breakfast or packed into a school lunchbox! My favorite is to enjoy it with butter and cheese.


 Enjoy!

Kladdkaka (gooey chocolate cake)– A Swedish Classic

Today, I want to share a true Swedish favorite – kladdkaka! This wonderfully gooey chocolate cake is loved by both young and old in my family, and it's perfect for everything from family gatherings to a simple weekday treat. It’s one of those desserts that always feels a bit indulgent, even though it’s so easy to make. 
This weekend, I made a kladdkaka that we served with vanilla ice cream with chocolate, and red currants. The best part was that the currants were freshly picked from my garden – tart, fresh, and full of flavor. The combination of the sweet, warm kladdkaka, the cold vanilla ice cream, and the tangy currants was absolutely divine. This is a dessert I’ll remember for a long time!

Ingredients:
150 g butter
3 dl sugar
2 eggs
1.5 dl flour
4 tbsp cocoa powder
1 tsp vanilla sugar
A pinch of salt

Method:
1.Preheat the oven to 175°C.
2. Melt the butter in a saucepan and let it cool slightly. Whisk together the eggs and sugar until light and fluffy.
3. Sift in the flour, cocoa powder, vanilla sugar, and salt. Stir gently. Add the melted butter and mix until the batter is smooth. 
4. Pour the batter into a greased cake pan, about 24 cm in diameter. Bake in the middle of the oven for 15–20 minutes. The cake should be gooey in the center when you take it out.

5. Let the cake cool slightly before serving with vanilla ice cream with chocolate, and red currants.
The kladdkaka was absolutely delicious, especially with the fresh currants from the garden. Their tartness complemented the rich chocolate so beautifully. It’s these little touches that can make a simple cake feel extra special. 
 

Kladdkaka is one of Sweden's most beloved desserts, known for its rich chocolate flavor and delightfully gooey texture. It’s easy to bake but results in a luxurious cake perfect for both everyday fika and special occasions.

The History of Kladdkaka

The origins of kladdkaka are somewhat mysterious, with several theories surrounding its creation. The most popular theory suggests that it emerged in Sweden during the 1970s, possibly inspired by the French chocolate fondant or the American brownie, both of which share a similar gooey texture.


What makes kladdkaka unique is that it contains no baking powder, meaning it doesn’t rise like a traditional cake. This results in the dense, fudgy center that defines the dessert. It's this characteristic that has made kladdkaka such a beloved treat in Sweden.

 In recent decades, kladdkaka has become a staple of Swedish fika culture. Its simplicity and rich flavor make it a favorite for many, and it can be customized in various ways – with nuts, fruit, or even a touch of coffee in the batter.

 Kladdkaka may have a mysterious history, but its role in Swedish homes is undeniable.

Enjoy!


Sunday, 25 August 2024

Fruit Patter with Melted Chocolate

A Dessert to Remember

This fruit platter with melted chocolate is more than just a dessert—it’s a fun way to enjoy fresh, seasonal fruits with friends. It’s perfect for any occasion as well. I've served it when hosting a casual get-together, at dinner party, or when I simply want to treat myself to something sweet.

Ingredients:

  • For the Fruit Platter:
    • 1 cup strawberries
    • 2 bananas, sliced into thick rounds
    • 1 bunch of grapes, separated into small clusters
    • 1 cup pineapple chunks
    • 1 cup raspberries 
    • milk chocolate, broken into pieces
    • Any other favorite fruits (blueberries, apples, mango, etc.
  • For the Melted Chocolate:
    • 1 cup dark or milk chocolate chips (or chopped chocolate)
    • 2 tablespoons heavy cream or milk (optional, for a smoother consistency)

Instructions:

1. Wash and prepare all the fruits. Arrange them on a large platter, grouping similar fruits together for a colorful and visually appealing display.

2. In a heatproof bowl, add the chocolate chips or chopped chocolate. Melt the chocolate using one of the following methods:

Microwave: Heat the chocolate in 30-second intervals, stirring between each interval, until fully melted and smooth. Be careful not to overheat it.

Double Boiler: Place the bowl over a pot of simmering water (make sure the bowl doesn’t touch the water) and stir the chocolate until it melts completely. If you prefer a slightly thinner consistency, stir in the heavy cream or milk until well combined.

3. Pour the melted chocolate into a small bowl or fondue pot and place it next to the fruit platter. 

4. Provide skewers, forks, or toothpicks for easy dipping. Gather your friends around the platter and enjoy dipping the fresh fruits into the warm chocolate. The combination of textures and flavors is sure to delight everyone.

 Enjoy!

Friday, 23 August 2024

A Solo Summer Delight: Crispy Salad

A Solo Summer Delight: Crispy Salad and Homemade Toast

Recently, I had one of those rare, quiet afternoons at home alone, and I decided to treat myself to something fresh and vibrant—a crispy salad packed with colorful vegetables and drizzled with tangy pomegranate molasses. Paired with homemade toast, it turned out to be a perfect light meal to enjoy in my garden while soaking up the sun and listening to the summer podcast, Sommarpratare

The Joy of a Crispy Summer Salad

Salads are often seen as a side dish, but when done right, they can easily be the star of the meal. This crispy salad was everything I wanted: crunchy, refreshing, and full of flavors. The combination of red cabbage, fresh parsley, juicy tomatoes, and crisp cucumber created a beautiful medley of textures and tastes. The addition of pomegranate molasses was pricken över i:et :)

After putting together the salad, I made a simple toast in the oven—crisping up some good quality bread with a drizzle of olive oil and a sprinkle of salad spices. It was the perfect complement to the salad, adding a bit of warmth and crunch to the meal.

 I took my plate outside to the garden, and hit play on my latest podcast episode. As I savored each bite, the combination of flavors and the peacefulness of the garden created a moment of pure bliss. 


Crispy Summer Salad with Pomegranate Molasses

Ingredients:

 2 cups red cabbage, thinly sliced

1 cup fresh parsley, chopped

1 large tomato, diced

1 red bell pepper (paprika), sliced into thin strips

1 cucumber, chopped

½ red onion, thinly sliced

2 tablespoons pomegranate molasses

2 tablespoons olive oil

1 tablespoon lemon juice

Salt and pepper, to taste

Italian salad spice mix

For the Homemade Toast:

 2 slices of good quality bread (sourdough or ciabatta works well)

1-2 tablespoons olive oil

A pinch of sea salt

Italian salad spice mix

Method:

 In a large bowl, combine the red cabbage, parsley, tomato, red bell pepper, cucumber, and red onion. Toss everything together gently to mix the ingredients evenly.

Make the Dressing: In a small bowl, whisk together the pomegranate molasses, olive oil, lemon juice, s&p , and Italian salad mix. Taste and adjust the seasoning as needed.

Pour the dressing over the salad and toss until all the vegetables are evenly coated. Let the salad sit for a few minutes to allow the flavors to meld together.

Prepare the Toast: Preheat the oven to 190°C. Drizzle the bread slices with olive oil and sprinkle with sea salt and Italian salad mix. Place them directly on the oven rack or on a baking sheet and toast for about 8-10 minutes, or until golden and crispy.

Serve the salad with the warm toast on the side. For the full experience, take your meal outside, find a comfortable spot, and enjoy it with a good podcast or book.A Perfect Summer Moment

It is incredibly soothing eating a meal you’ve prepared yourself, especially when you can enjoy it in a peaceful setting like a garden. This crispy salad, with its vibrant colors and refreshing flavors, was exactly what I needed to feel nourished and content on that summer afternoon. The crunch of the vegetables, the tang of the pomegranate molasses, and the simple pleasure of homemade toast made it a meal I sure will eat again. 

Enjoy!
 

A Perfect Friday Afternoon: Homemade Chocolate Muffins

 A Perfect Friday Afternoon: Early Finish, Leftover Pasta, and Homemade Chocolate Muffins

Fridays are always special, but there's something magical about finishing work early and having extra time to spend with the kids. Today was one of those days. Instead of rushing through the evening routine, we decided to make the most of the afternoon by baking together, as I promised kids a lovely dessert.

Leftover pasta was on the menu for dinner, which meant more time for fun and less time in the kitchen. The simplicity of leftover pasta is something I always appreciate. It's warm, comforting, and quick, leaving room for creativity in the kitchen. As we sat down for dinner, the kids devoured the pasta, knowing that dessert was the main event of the evening.

 Baking Chocolate Muffins Together

What’s better than chocolate muffins? Chocolate muffins made with love by little hands. Before dinner, we gathered in the kitchen to whip up a batch of homemade chocolate muffins. The kids were thrilled to help, and it turned into a mini baking lesson. They couldn’t wait for it!

For the recipe, I used the ICA`s recipes but made a few changes.  

Easy Chocolate Muffins

Ingredients:

  2 dl all-purpose flour

1 dl unsweetened cocoa powder

2 dl granulated sugar

2 tsp baking powder

½ tsp salt

2 dl milk

½ cup melted butter

1 large eggs

2 tsp vanilla sugar

Instructions: 

1. Preheat the oven to 175°C) and line a muffin tin with muffin cups.  

 2. In a large bowl, sift together the flour, cocoa powder, vanilla sugar, sugar, baking powder, and salt. This is a great step for the kids to help with. They love watching the ingredients come together!

 3. In another bowl, whisk together the milk, melted butter, and egg. Pour the wet ingredients into the dry ingredients and stir until just combined. You don’t want to overmix.

 4. Spoon the batter into the muffin cups, filling them about two-thirds full. The kids enjoyed taking turns with this, even if a bit of batter ended up on the counter!

 5. Place the muffin tin in the oven and bake for 20 minutes or until a toothpick inserted into the center of a muffin comes out clean.

 Let the muffins cool in the tin for about 5 minutes, then transfer them to a wire rack to cool completely. But let's be honest, we couldn’t wait that long. We quickly ate the pasta, as the kids insisted on having them warm, with a glass of cold milk.

The muffins were moist, rich, and bursting with chocolate flavor—exactly what we needed. The kids were so proud of their creation, and I loved watching them enjoy making and eating them. 


Enjoy!


Thursday, 9 May 2024

Pizza Sandwich - Pizzamackan!

With the advent of social media, it's become incredibly easy to discover new recipes online. One of them that caught my eye on Instagram is the pizza sandwich. It was Helan Shabani who shared her pizza sandwich, and my friends and I were immediately hooked. We actually made this sandwich on a girls' trip together. While I didn't have the right dough on hand, it turned out delicious nonetheless. Although, in hindsight, we should have made them smaller. But when the eyes are hungry...


Ingredients:

 Pesto (store-bought or homemade)

Red onion

Arugula

Garlic cloves

Cherry tomatoes

burrata or mozzarella

Fresh basil

Crema di balsamico

Balsamic vinegar

Store-bought pizza dough

Instructions:

 1. Preheat the oven and roll out the dough to the desired size for the sandwich. Bake the pizza dough according to the instructions provided. Drizzle olive oil on one half of the pizza, fold it over, drizzle on top, and slide it into the oven. Remove when it's baked and has a nice golden surface.


While the pizza is baking, slice the tomatoes and marinate them in finely chopped basil, grated garlic, olive oil, chopped red onion, and balsamic vinegar to taste. Add salt and pepper according to your preference.


Let the bread cool, spread pesto on it, top with the tomato mixture, and spread the burrata or mozzarella on top of the tomatoes. Finish with arugula and drizzle crema di balsamico over it. Cut into desired pieces and enjoy!


Enjoy!

Wholesome Leftovers Remix: Rice, Tabouleh, Hummus, and Chicken


Ever find yourself staring at a mishmash of leftovers in the fridge, wondering what on earth you could possibly make with them? Fear not!  Here is how to transform those odds and ends into a delicious and nutritious meal. We're going to take leftover rice, tabouleh, hummus, fried chicken, and chopped veggies like paprika and turn them into a satisfying and colourful meal.

 Ingredients:

Leftover rice

Leftover tabouleh

Leftover hummus

Fried chicken pieces (or any cooked chicken you have)

Chopped veggies (e.g., paprika, cucumber, tomato, onion)

Optional toppings: fresh herbs, olives, feta cheese, lemon wedges

Method:

Gather your leftovers: rice, tabouleh, hummus, fried chicken, and any chopped veggies you have on hand. Don't worry if they're not perfectly fresh – this is the beauty of using leftovers!

Start by reheating the leftover rice either in the microwave or on the stovetop until warm. Fluff it up with a fork to revive its texture.

Next, if your tabouleh is a bit dry, you can freshen it up by squeezing a bit of lemon juice over it and giving it a gentle toss.

Assemble your plate by placing a generous serving of warm rice at the bottom. Top it with a portion of tabouleh. Add your fried chicken pieces. Feel free to use depending on your preference – the crispy chicken adds a delicious crunch and protein to the bowl.

Dollop a generous spoonful of hummus on the plate. Hummus adds creaminess and flavour, balancing out the textures and tastes.

Scatter your chopped veggies over the top of the plate. Get creative with your combinations – paprika adds sweetness, cucumber adds freshness, tomato adds juiciness, and onion adds a bit of bite.

If you're feeling fancy, sprinkle some fresh herbs like parsley or mint over the plate for a burst of colour and flavour. You can also add olives, crumbled feta cheese, or a squeeze of lemon juice for extra zest. Then dig in and enjoy your wholesome leftovers remix!

Leftovers may not always look glamorous on their own, but with a little creativity and know-how, you can transform them into something truly special. This rice, tabouleh, hummus, fried chicken, and chopped veggies plate is the perfect example of how simple ingredients can come together to create a delicious and satisfying meal. So raid your fridge, gather your leftovers, and give it a try – you'll be amazed at what you can create!


Enjoy!

Spaghetti with fried aubergine and feta cheese

Ever have those lazy days when you're craving pasta but don't want the hassle of making a tomato sauce? Well I do. This spaghetti with fried aubergine and feta cheese is a simple yet incredibly satisfying dish that's sure to become a favorite for those relaxed evenings when you just want something comforting. 

Ingredients:

 250g spaghetti

1 large aubergine (eggplant), cut into cubes

150g feta cheese, crumbled 

1 onion, chopped 

black olives, chopped 

oil 
Salt and pepper to taste 
Fresh basil leaves for garnish (optional)

Method:

1. Cook the spaghetti according to the package instructions. Drain and set aside.

2. While the spaghetti is cooking, heat a generous amount of oil in a large frying pan over medium heat. Add the cubed aubergine and fry until golden brown and tender together with the chopped onion. Once the aubergine is cooked. 

3. Add the cooked spaghetti to the frying pan with the fried aubergine and onion. Toss everything together until well combined, adding olive oil if needed to prevent sticking.

4. Crumble the feta cheese over the spaghetti and aubergine mixture, and gently toss to incorporate. Sprinkle the chopped olives on top. Season with salt and pepper to taste, and garnish with fresh basil leaves if desired.

Serve the Spaghetti with Fried Aubergine and Feta Cheese hot, and enjoy the delightful combination of flavors and textures!


 Enjoy!

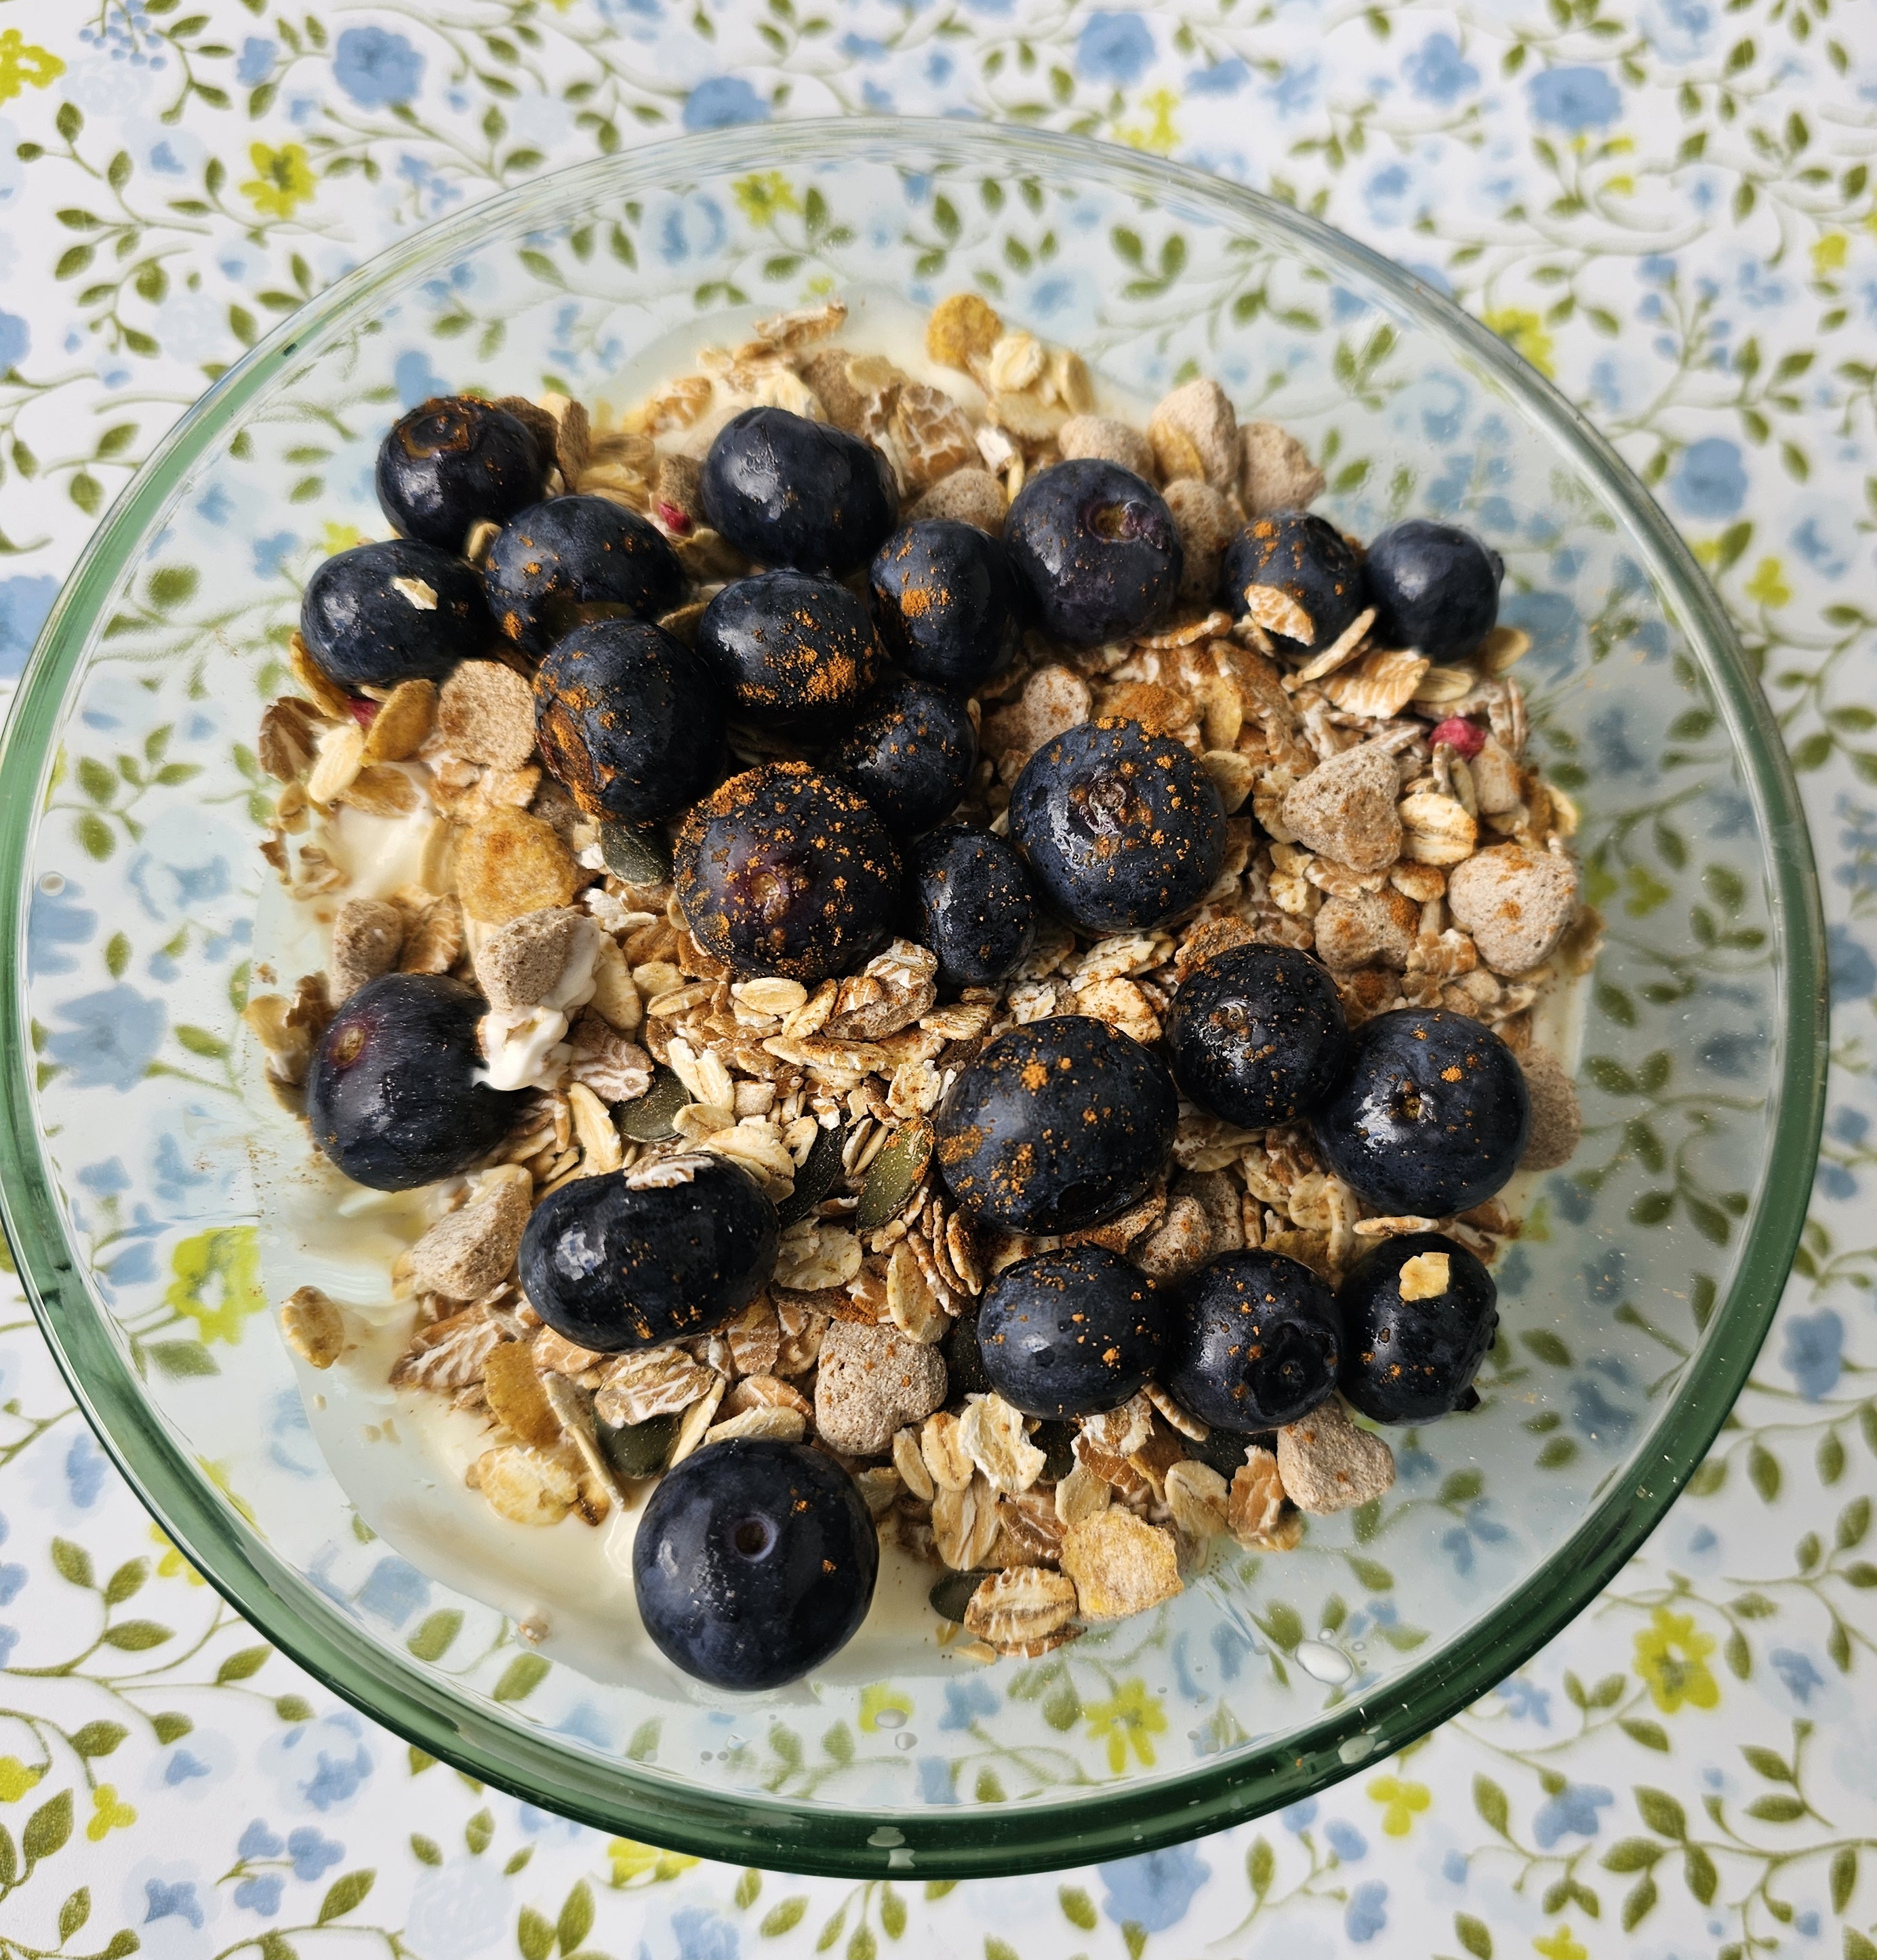
Greek Yogurt Parfait with Fresh Blueberries and Muesli

Looking for a quick and yummy breakfast? Try a Greek yogurt parfait. It's creamy, crunchy, and bursting with fresh blueberries. And guess what? It’s not just for breakfast – it’s a perfect snack on the go too! 


Ingredients:

 Greek yogurt

Fresh blueberries

ground cinnamon 

Muesli (you can buy it or make your own)

Method:

Spoon some Greek yogurt into a glass or bowl. It’s thick and creamy, perfect for our parfait base. Sprinkle muesli on top of the yogurt. It adds crunch and fiber to keep you full. Add a handful of fresh blueberries. They’re sweet, juicy, and packed with goodness. Sprinkle a bit of cinnamon over the blueberries for a warm, cozy flavor. 

If you want it sweeter, drizzle a bit of honey or maple syrup.

Grab a spoon and enjoy!

Why It's Great On-the-Go:

This parfait isn’t just tasty – it’s super handy too! Make it in a jar, or yogurt cup like this one from Rusta, and you’ve got a healthy snack ready whenever you need it. Perfect for busy days – grab it on your way out the door. Plus, you can mix it up with your favorite toppings like almonds or chia seeds.


 Enjoy!

Saturday, 27 April 2024

Creamy Mushroom Pasta

Last weekend, as the weather couldn't quite decide whether to be hot or cold, we found ourselves cozied up indoors, relishing the opportunity to cook a meal together. We settled on a creamy mushroom pasta that promised warmth and satisfaction on a temperamental day.


Ingredients:

 300g pasta of your choice, I am using spaghetti

300g mushrooms, sliced

2 cloves garlic, minced

1 onion, chopped

half a pepper, chopped

half a zucchini, chopped

4 sun dried tomatoes, chopped  

200ml heavy cream

3 tbsp olive oil

1 tbsp tomato puree

Salt and pepper to taste

herbs and spices to taste: dried parsley, dried basil, paprika

Fresh basil for garnish

Grated Parmesan cheese (optional)

Method:

 1. Cook the pasta according to package instructions until al dente. Drain and set aside, reserving some pasta water.

2. In a large pan, heat olive oil over medium heat. Add the chopped onion and minced garlic, sauteing until softened and fragrant. Add the sliced mushrooms to the pan, cooking until they are golden brown and tender. Add rest of the vegetables and cook until soft and golden brown. Then add tomato puree. 


3. Pour in the heavy cream, stirring gently to combine with the mushrooms. Allow the sauce to simmer for a few minutes until it thickens slightly. Season the sauce with salt and pepper to taste, adjusting as needed. Add the spices to taste.

4. Add the cooked pasta to the pan, tossing until it is evenly coated with the creamy mushroom sauce. If the sauce seems too thick, you can loosen it with a splash of reserved pasta water.

5. Serve the creamy mushroom pasta hot, garnished with freshly basil and grated Parmesan cheese if desired.

As we enjoyed each bite of the creamy pasta, we felt comforted by its simple goodness. The sauce was rich and smooth, blending perfectly with the earthy taste of the mushrooms. Even the kids couldn't get enough!

With the rain softly falling outside, we found happiness in cooking together. Throughout the weekend, we cherished these moments of togetherness and the joy of cooking as a family. 

I promised the kids they could help out more often. Of course, they wanted to do the chopping, much to a mother's dismay 😊


 Enjoy!

Friday, 26 April 2024

Chicken sandwich with pickled red onion

Last weekend I was in the mood for a quick and delicious meal using the leftover chicken we had, transforming it into something nice. I made a mouthwatering Chicken Sandwich with Pickled Red Onions. This sandwich was not only bursting with flavour but also incredibly easy to make, especially when you have some leftover chicken on hand. Plus, with the addition of a special KFC-style buttermilk mayo, every bite was a delight. Let's dive in!


Ingredients:

 Leftover cooked chicken (shredded or sliced)

1 cup pickled red onions (homemade or store-bought)

4 burger buns or sandwich rolls

KFC-style buttermilk mayo (store-bought or homemade)

Fresh basil leaves

Optional: Sliced tomatoes, avocado, cheese


Method:

 1.       If you haven't already, shred or slice your leftover cooked chicken into manageable portions.

Ensure you have your pickled red onions ready. If you haven't made them yet, check out my quick pickled red onion recipe.

Gather the rest of your ingredients, including the burger buns or sandwich rolls, KFC buttermilk mayo, basil leaves, and any optional toppings you desire.

2.       Take each burger bun or sandwich roll and spread a generous amount of KFC-style buttermilk mayo on both the top and bottom halves. Layer the bottom half of each bun with a portion of shredded chicken, followed by a hearty helping of tangy pickled red onions on top of the chicken, basil, and any other topping of choice. Finally, place the top half of the burger bun or sandwich roll on top to complete the sandwich.


Pair them with your favourite sides, such as potato chips, coleslaw, or a crisp green salad, for a satisfying meal.

Don't forget to have plenty of napkins on hand, as these sandwiches can get delightfully messy with each flavourful bite!

With just a few simple ingredients and a little creativity, you can transform your leftover chicken into a culinary masterpiece. This Chicken Sandwich with Pickled Red Onions is a testament to the beauty of using what you have on hand to create something truly delicious. 


 Enjoy!

Dried Fruit Platter

Eid was celebrated a few weeks ago, and one thing that always graces our table when we entertain guests is my beloved platter of dried fruit. Loved by both young and adults alike, this delightful assortment adds a touch of sweetness and sophistication to any gathering. 

Why Choose Dried Fruits as Snacks?

Let's take a moment to appreciate why dried fruits are an excellent choice for snacking:

-          Dried fruits are packed with essential vitamins, minerals, and fiber, making them a nutritious option to fuel your body and keep you feeling satisfied between meals.

-          Whether you're on the go or lounging at home, dried fruits are a convenient snack that requires no preparation. Simply grab a handful and enjoy it.

-          Unlike processed snacks loaded with added sugars, dried fruits offer a naturally sweet taste derived from their concentrated sugars.


-          Dried fruits have a longer shelf life compared to fresh fruits, making them a pantry staple that you can enjoy year-round.


 The Dried Fruit Platter:

Dried figs

Dried apricots

Dried plums (prunes)

Dates

Walnuts (halved or whole)


Method:

1. Using a sharp knife, carefully make a small incision in each dried fig, creating a pocket for the walnut filling. Insert a walnut half or whole walnut into the cavity of each fig. 

2. Slice each date lengthwise and remove the pit. Replace the pit with a walnut half or whole walnut, pressing gently to secure the filling in place.  

3. Arrange and Serve: Once you've prepared your stuffed dried fruits, arrange them on a platter together with walnuts, dried apricots, and dried plums.  Serve your Dried Fruit Platter as a wholesome snack, appetizer, or elegant dessert option at your next gathering.  


Enjoy!

Saturday, 20 April 2024

Pickled red onions

Have you ever tried pickling red onions at home? Well, I have, and it’s super easy! 😊 Pickled red onions add a burst of flavor to any dish, complementing everything from meats and fish to poultry and vegetarian options. My colleague taught me a very easy method: a simple 1-2-3 mixture of water, vinegar, and sugar, and you can whip up this versatile pickling solution in no time.

It’s tangy and sweet and gives any dish a pop of flavor and color.


Ingredients:

1 dl White vinegar (12%)

1.5 dl sugar

3 dl water

2 red onions


Method:

Peel and thinly slice one medium-sized red onion.

In a saucepan, combine water, vinegar, and sugar. Add any desired flavorings such as whole peppercorns, mustard seeds, or fresh herbs.

Bring the pickling solution to a boil, then reduce heat to low and simmer for a few minutes until the sugar dissolves completely.

Place the sliced red onion in a clean jar or container and pour the hot pickling solution over the onions, ensuring they are completely submerged. Let cool to room temperature, then seal the jar and refrigerate. The pickled red onions will be ready to use within a few hours but will develop better flavor if left to pickle overnight. Enjoy them as a tangy topping for sandwiches, salads, tacos, or burgers!


 Enjoy!

Sunday, 7 April 2024

Fast food on your way home

I'm on my way home and thinking about what we should have for dinner. One of my favorite go-to fast dinners is pizza. I usually buy a margherita pizza base and customize it with whatever leftover veggies or toppings I have on hand. Typically, I use bell peppers, squash, corn, mozzarella cheese, chicken, or whatever leftovers I have from yesterday's dinner.

 I chop up all the veggies, sprinkle them over the pizza, add extra cheese, and bake it in the oven until golden brown. I usually serve it with a fresh green salad and ice-cold cola. Yum


Monday, 1 April 2024

Mahalabiya - Middle Eastern Milk Pudding

Mahalabi, muhallabi or mahalabiya, well-loved dessert known by many names (or a dear child with many names which is a Swedish idiom), is a creamy and light milk pudding that delights the palate. 

We recently had friends over during the winter break, and they treated us to this delicious dessert. It was the perfect ending to a day spent sledding (åka pulka or tobogganing, to be more precise) and indulging in hearty meals. My kids call it åka ulka-pulka :).

Mahalabi reminds me of pannacotta, however, this lovely pudding is usually flavored with rose water or orange blossom water, adding a touch of floral elegance to every spoonful. it is often garnished with nuts, pistachios, almonds or sprinkled with cinnamon. To make it extra fancy, you can garnish the pudding with edible rose petals.

Ingredients:

 4 cups whole milk

1/2 cup sugar

1/4 cup cornstarch

1 teaspoon rose water or orange blossom water (optional)

Ground pistachios or almonds for garnish

Ground cinnamon for garnish

Optional: to make it creamer, add ½ cup of heavy cream with the milk


Method:

1.  In a saucepan, combine the whole milk and sugar. Place it over medium heat and stir until the sugar dissolves completely.

2.         In a small bowl, mix the cornstarch with a few tablespoons of cold milk to create a smooth slurry.

3.       Once the milk begins to simmer, pour in the cornstarch slurry while continuously stirring to prevent lumps from forming.

4.        Cook the mixture, stirring constantly, until it thickens to a pudding-like consistency. This should take about 5-7 minutes.

5.        Flavoring (Optional): If using rose water, stir it into the thickened milk mixture. The rose water adds a delicate floral flavor to the pudding.

6.        Remove the saucepan from the heat and pour the pudding into individual serving bowls or a large serving dish.

7.      Allow the pudding to cool to room temperature before covering it with plastic wrap and transferring it to the refrigerator to chill for at least 2 hours, or until set.

Serve: Once chilled and set, remove the mahalabiya from the refrigerator. Garnish each serving with ground pistachios or almonds and a sprinkle of ground cinnamon for added flavor and visual appeal.

Enjoy: Serve the mahalabiya chilled as a delightful dessert or sweet treat, perfect for enjoying on its own or alongside your favorite Middle Eastern dishes.

This creamy and indulgent mahalabiya  will surely impress your family and friends with its rich flavor and silky texture.


 Enjoy!

Sunday, 31 March 2024

Waffled Swedish Potato Pancakes - våfflad potatisbulle

Waffled potato pancake

Many nights have been spent by me scrolling through my phone in search of simple and delicious recipes. Most of the time, I browse Instagram, where I follow many talented individuals who come up with amazing recipes. That's how I came across Helan Shabani's version of a waffled potato pancake, våfflad potatisbulle

So, what is a Swedish potato pancake?

Potatisbullar, known as "Swedish Potato Pancakes" in English, are a traditional Swedish dish. These delicious small pancakes are typically made from boiled potatoes (and sometimes onions) mixed with egg and flour, then fried to golden perfection. They are crispy on the outside and soft on the inside, often served with lingonberry jam. 

A waffled potato pancake is simply made in the waffle iron. I usually buy my potato pancakes and place one or two in the waffle iron until they become hot and crispy. Then I add a dollop of sour cream, seaweed caviar (tångkaviar, vegan caviar made from seaweed), finely chopped onion, dill, and lemon juice.

When I lived in England, I bought hash browns from the freezer section. That was the closest I came to Swedish potato pancakes. But if you'd like to make your own potato pancakes at home, you can use the recipe below:

Swedish Potato Pancakes (Potatisbullar)

 Ingredients:
4 large potatoes

1 onion

1 egg

2 tablespoons all-purpose flour

Salt to taste

Butter or oil for frying

Lingonberry jam or sour cream for serving (optional)


Method:

Peel and boil the potatoes. Cut the boiled potatoes into smaller pieces and mash them. Small pieces should preferably remain. Finely chop the onion and mix it with the mashed potatoes in a large bowl.

Add the egg, flour and salt  to the potato and onion mixture. Mix well.

Heat a frying pan with butter or oil over medium heat.

Take a small amount of the potato mixture and shape it into a flat, round pancake with your hands. Place it in the frying pan and flatten it slightly with a spatula.

Fry the potato pancakes on each side until golden brown and crispy, about 4-5 minutes per side.

Serve the potato pancakes hot with lingonberry jam or sour cream. Or put them in the waffle iron!


 Enjoy!